
Just a few months ago I posted a blog titled “Gingerbread“. In case you think I might be losing my mind, I’m not (hopefully), this blog is about making (and eating) Gingerbread. If you want to know the origins of how this exotic spice became such an important part of the culture in Great Britain, please click on this link … GINGERBREAD. It will give you all the background you’ve ever wanted to know about ginger and the making of this confection. Meanwhile, I’m actually making my own moist, dense, rich ‘GINGERBREAD‘.
As always, before making any recipe, I go through all my cookbooks (of which I have more than I can count) as well as check all the internet foodie blogs to find the ‘best of the best’ recipes. Some recipes were more like a light, fluffy spice cake with cream cheese frosting. Not what I was looking for at all. What I wanted was an old-fashioned, dense, rich cake-like bread. It should be easily held in your hand, not requiring a plate. It should be packed full of peppery ‘ginger’ flavor … not cinnamon, cloves or allspice. It should be moist … not dry. And, most of all, it should be delicious.
I’ve tried more recipes than I want to admit. And culled from a few different recipes, here is MY favorite by far. It is quite easy to make, but it’s not for the timid. It’s for ginger lovers everywhere. If you want more or less ginger, feel free to adjust the quantities.
GINGERBREAD
Bake at 350° Makes one large round bundt pan, or two or more loaf pans.
3/4 cup butter, cubed
1/2 cup vegetable oil
1/2 cup water
3/4 cup molasses
1/2 cup cane syrup, or corn syrup or honey
1 cup packed dark brown sugar
2-1/2 cups all-purpose flour
1/2 cup cocoa
3 teaspoons baking soda
1 teaspoon salt
3 tablespoons ground ginger (more or less to taste)
1 teaspoon cinnamon
3 large eggs, room temperature
1/2 cup full-fat milk
2 tablespoons grated fresh ginger
 About an hour before you want to make the Gingerbread, combine the following ingredients in a saucepan: Cubed butter, vegetable oil, water, molasses, brown sugar, golden syrup or honey. Simmer over low heat until the butter is melted, the sugar has dissolved and everything is well combined.
 Cool completely before adding this mixture to the dry ingredients. It should be just warm to the touch. If you want to cool this mixture quickly, set the pan into a bowl of ice water.
Preheat the oven to 350° and prepare your baking pans – a large round pan, or as many smaller pans as you’d like. Grease well.
In a large mixing bowl, combine all the dry ingredients: flour, cocoa, baking soda, salt, ground ginger and cinnamon.
 In a separate, smaller bowl, lightly beat together the eggs, milk and grated ginger.
When the syrup mixture has cooled, add it slowly to the dry ingredients. Blend well, but don’t beat. Then add the egg/milk/ginger combination to the batter. Again, be sure to blend well, but be sure not to overbeat the batter. Low speed on an electric mixer is fine. You don’t want to build up the gluten.
 Pour the batter into the greased pan(s) and bake. Depending upon the pan size and shape, it could take between 45 and 60 minutes. Check for doneness when a tester comes out clean.
 Cool for 15 minutes before removing from the pan. Then put on the kettle and don’t be afraid to dive in. It freezes well if you want to wrap it tightly in foil. Or it will keep nicely in the frig for a week, wrapped in cling film.
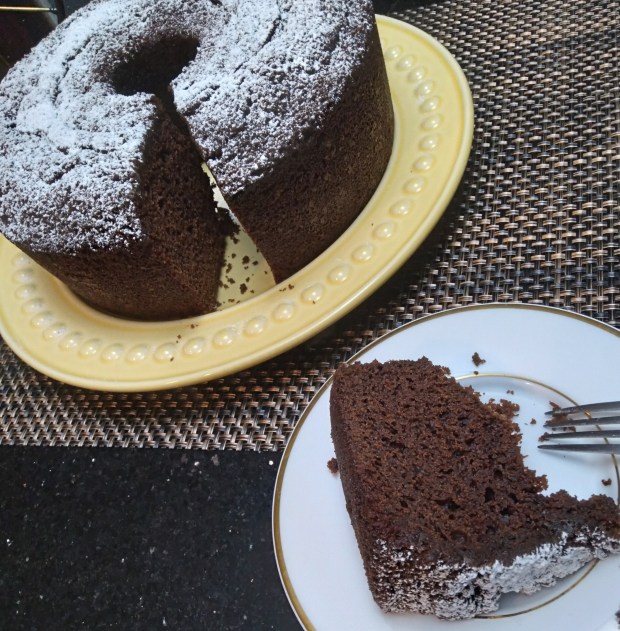 Dense, gingery and moist. I love this Gingerbread warm with a dusting of powered sugar and a big mug of tea! This is perfect for the holidays. Keep one on hand ready to serve for anyone who drops by … or just make to enjoy all by yourself!!
_____________________________________________________________________________


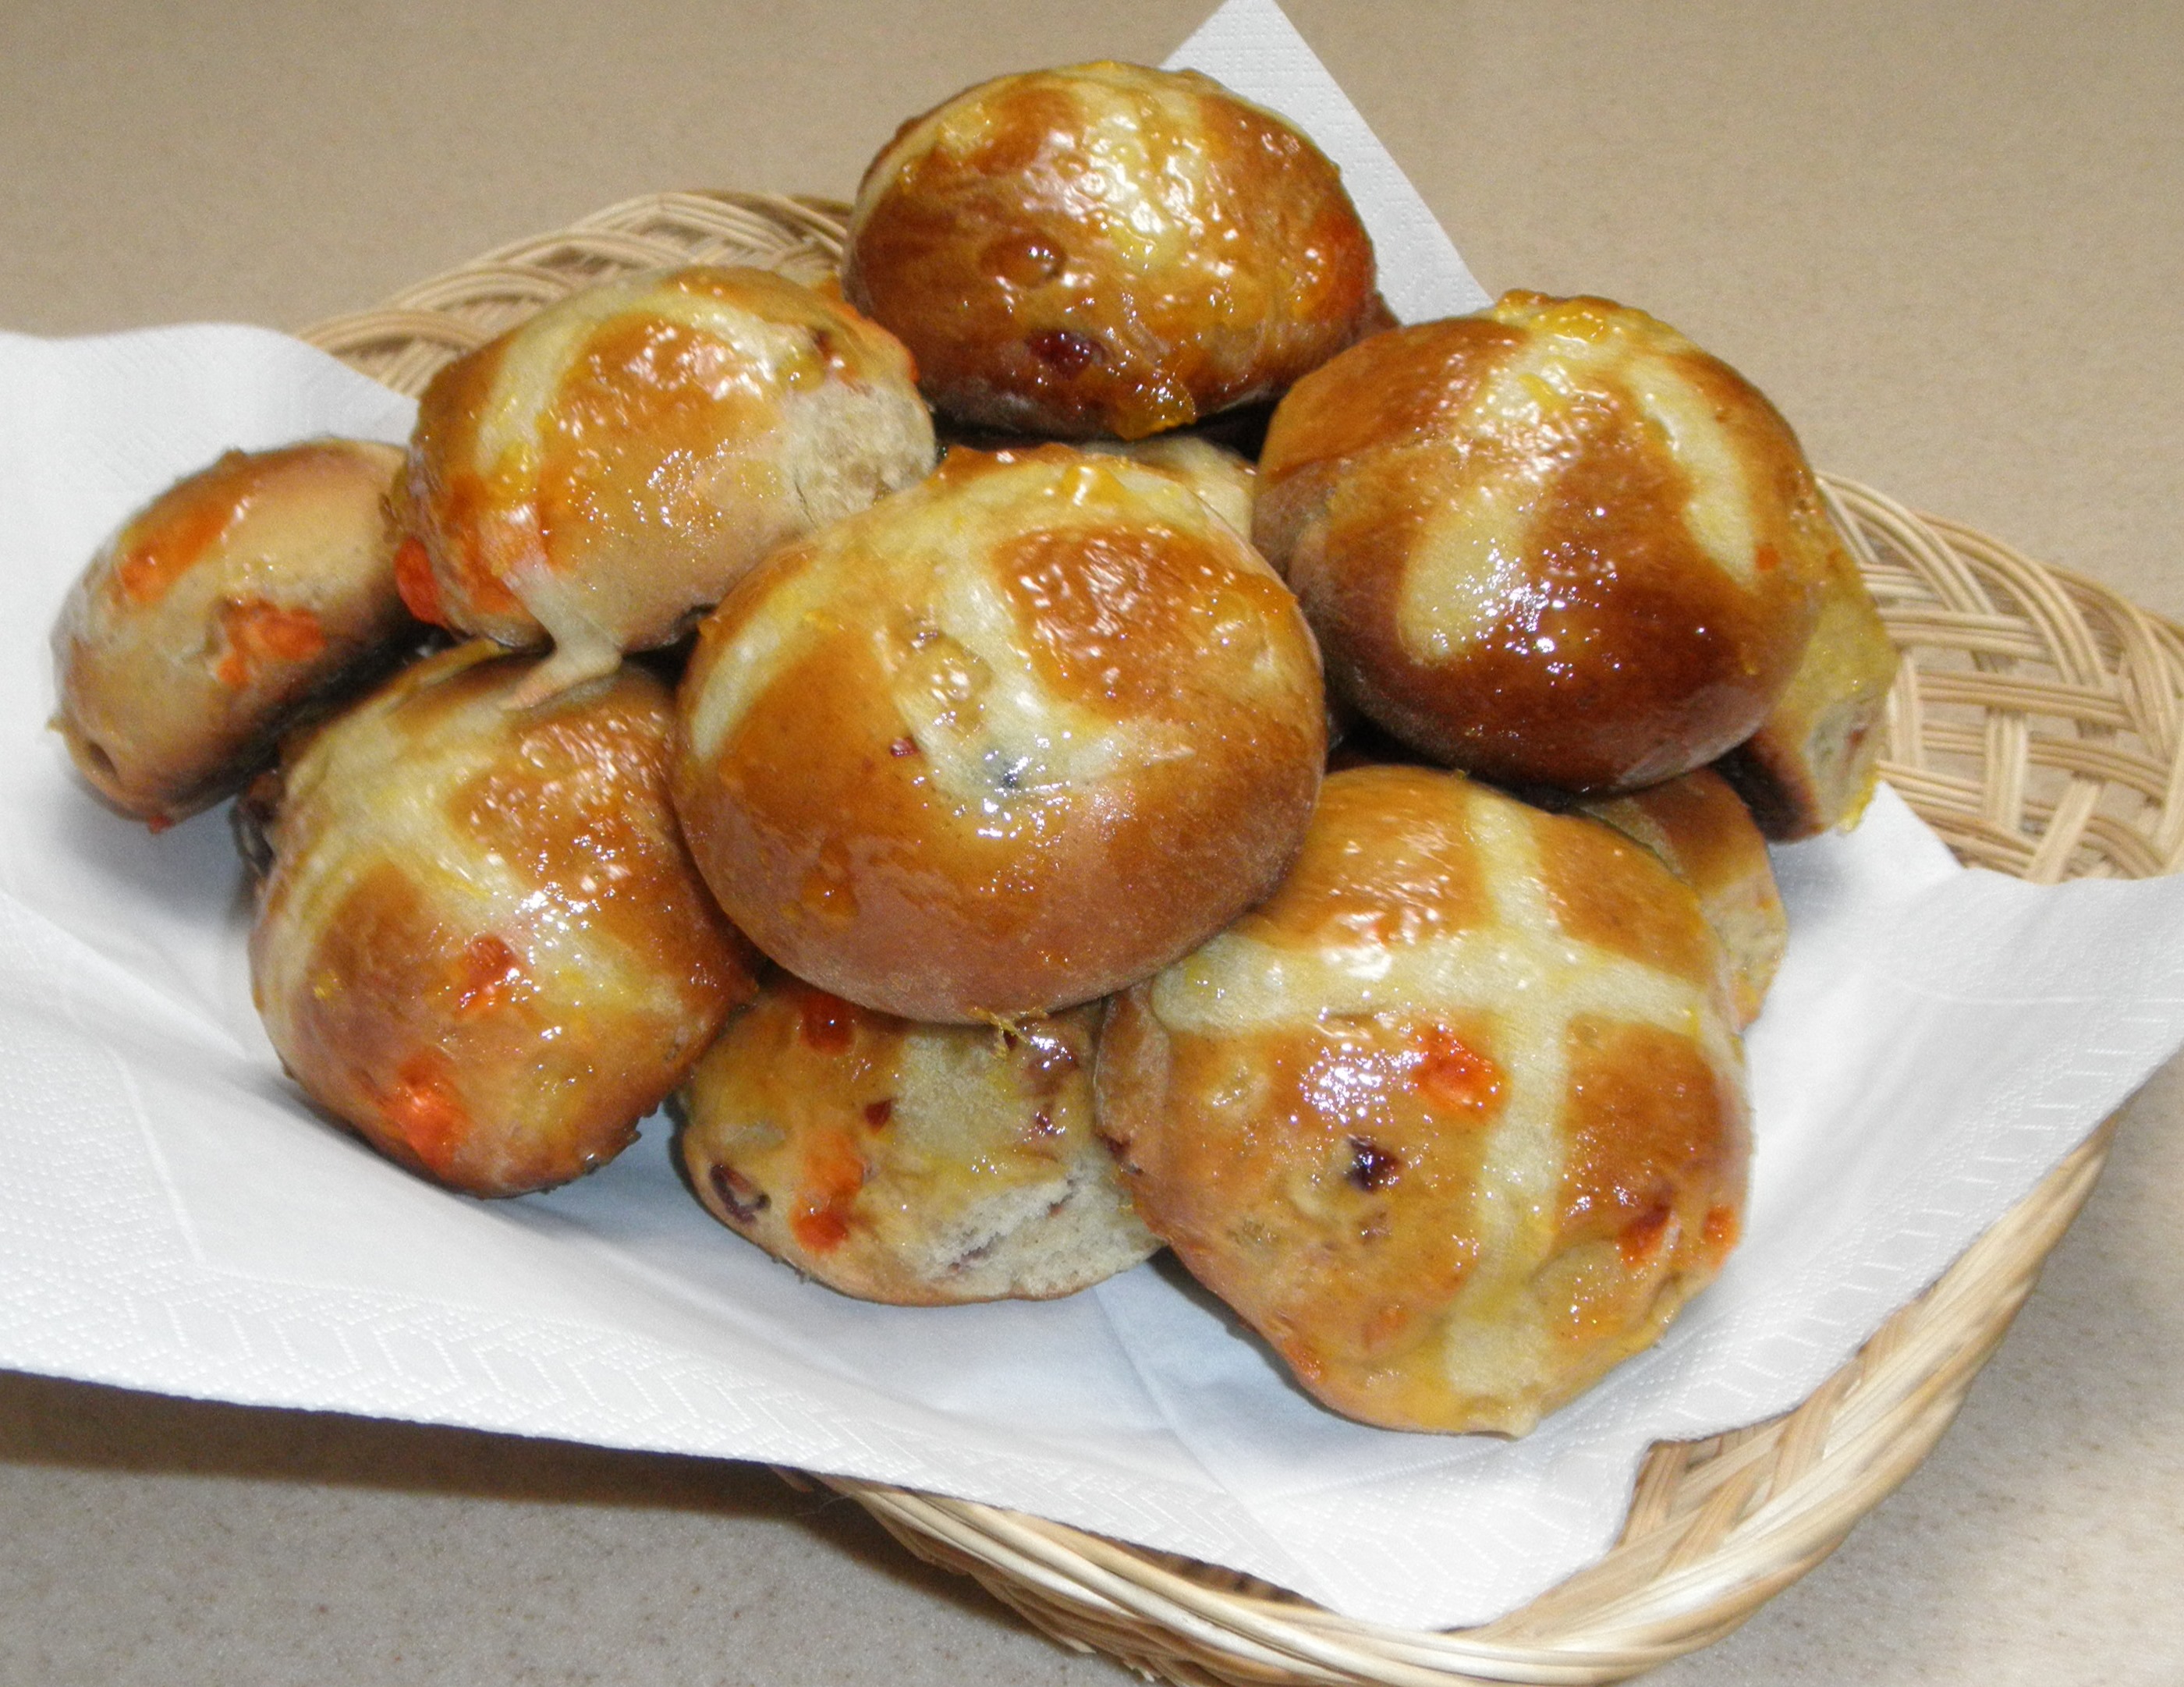
 The word quickly spread about these delicious, small, round grilled rolls. And soon bakers everywhere were making them and peddling them on the streets to the working classes. At that time it was far too dangerous for city homes and apartments to have an indoor working oven. As a result most people could not do their own baking. So this inexpensive bread roll became an easy breakfast to grab and go while on the way to work. Early in the morning, on the streets of London, with a wooden board balanced on his head and a bell in hand, the “muffin man” would walk up and down the “lanes” ringing his bell to signal his arrival.


 Put all the dry from the food processor into a large bowl, adding the nuts, and then, with a fork, stir in the pumpkin mixture. Work quickly mixing all the ingredients together until just blended. Do not overwork the dough or our scones will be heavy and tough.
 Dump the batter onto a lightly floured board. Knead lightly until smooth and form into a round or square shape.
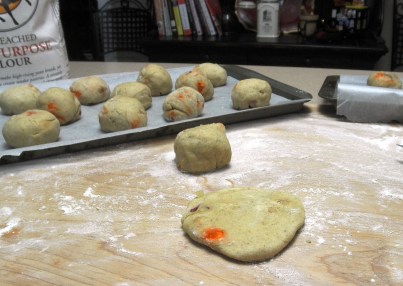
 Then roll to a thickness about 3/4″ high and approximately 8″ in diameter. The shape will depend upon how you want to cut them. The batter should still be soft and sticky. By dipping the biscuit cutter or knife into flour after every cut, you avoid squishing the dough together. Try to make clean cuts, not twisting or turning the dough. Whether you cut the scones into rounds or triangles or squares is all up to you! If you have any scraps after cutting, reform the dough and continue making more.
 Transfer the cut pieces onto a parchment lined baking sheet by again dipping a spatula into flour and lifting from underneath. Try not to compress the dough or add too much pressure. Arrange the scones on the baking sheet about 1/2″ apart. They will rise while baking. Brush the tops of the scones lightly with melted butter and sprinkle with brown sugar. Then place the baking sheet into the refrigerator for at least 30 minutes (or more). Only then should you preheat the oven to 425°.


 e cooking apple (not a Mac or Macoun – too juicy).
 Pour the batter into the prepared pan and bake for one hour. Test after about 50 minutes for doneness.
 When done, turn out onto a cooling rack and then put the kettle on.


 Using a dough hook (or wooden spoon if you are not using a stand mixer), blend all ingredients together until incorporated. Mix well. Add more water if needed to make a smooth dough. I like to beat the dough briskly so that my kneading time is reduced. Add the dried fruits at the last moment – incorporating thoroughly.
 the bowl in a warm spot, free from drafts, to let the dough rise until its about double in size (one to two hours).


 After the dough has fully proofed, punch it down to knock out all the air, and tip it onto a floured board again.
